If your replacement motorcycle chain is too long for your motorcycle, you will need to adjust it first for safe riding. Chains also stretch over time, but do not shorten the chain to solve this problem. Stretching is a sign of wear and tear, and as soon as your chain exceeds the maximum recommended on a stretch gauge, it should be replaced. In this article, we are going to know how we can shorten a motorcycle chain?
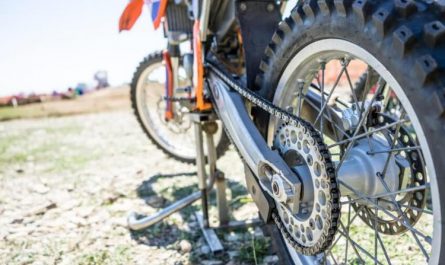
Motorcycle chains - General information
On the market, there are a whole bunch of motorcycle chains that meet specific needs. So, before you get started, we advise you to take a look at our complete guide on the subject.
Step 1: Disassembly of the chain
Determine if the chain needs to be replaced. Count 12 links, and measure them from the first axis to the last axis. The distance between these axes should be 30,48 cm (12 inches). If the distance is more than 30,80 centimeters, you need to replace the chain. This is because the pins wear out causing the chain to lengthen. If the distance between the 12 links is correct and you have an older motorcycle, consider loosening the rear wheel and pulling it back. This may allow enough slack in the chain to be made up to resolve the issue.
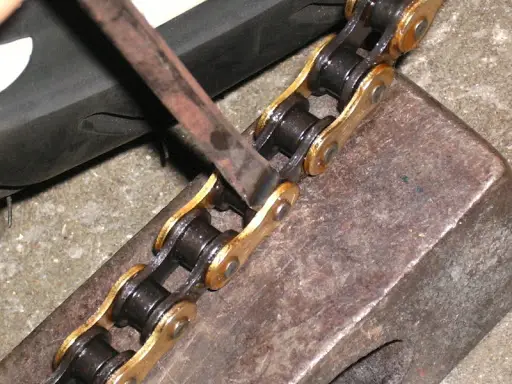
Buy a universal chain tool if you don't have one. This tool pulls the pins out of your chain to allow the links to be removed. If you know the make and model of your motorcycle chain, you may prefer to get a specialized tool for that specific chain. Some chains, including most high-end Shimano and Campagnolo models, also require a special winding pin. You cannot reassemble the chain without this pin, so make sure you have the correct part before you start.
Universal chain tool available on Amazon
Mount the motorcycle on a stand. If you don't have a stand, lean the motorcycle on something sturdy, preferably upside down. This will make it easier to remove the chain. Clean the chain if it is dirty. Use a high quality biodegradable chain cleaner or isopropyl alcohol to dissolve any dirt or grease. This will make it easier to handle the chain and find the main link.
Isopropyl alcohol available on Amazon
Step 2: Shorten Your Motorcycle Chain
Determine the number of links you need to remove. It is better to remove too few links at the start than to remove too many. It will be easier to remove one or two additional links than to add several. Secure the next link in the chain. Start with the end of the chain that is not attached to the main link. Hold this link in place with a vise or use the clamping mechanism of your chain tool, if applicable. If your chain does not use a main link, start with any link in the chain.
Push the pin all the way. Align the punch of the tool with the axis of the link. Slowly turn the chain tool handle clockwise and stop when the pin is clear of the outer plate but still attached to the link. Do not push the axle completely out of the link! In many cases, you will not be able to replace the axle if you push it completely out of the link. However, some manufacturers (including Shimano and Campagnolo) offer replacement axles, but not all axles are compatible with all chains.
If you accidentally pushed the pin all the way, you may be able to slide it down the center of the link. Use the chain tool to remove the top part of the connecting link, then slide the axle through the link until the top of the axle is flush with the middle part of the link. Replace the top of the link, then use the chain tool to push the pin up. Adjust the adjacent axis if necessary.
Step 3: Re-shorten your motorcycle chain
Repeat for the second axle and remove the link. Go to the other axis of the same link. Push it far enough to be able to remove one of the outer plates, then the center piece that secures it to the next link. Remove the extra links to shorten the chain. Remove only the minimum number of links for your chain to function - typically less than 5. The shorter the chain, the more stress is placed on the links. As before, leave the axles partially attached and set aside all components. Remember to save the chain links you remove for future repairs.
Chain links available on Amazon
Step 4: Reassemble the chain
Place the main link on both ends of the chain. You may need to use pliers or a screwdriver to achieve this. Push the two links together until you feel the pins click into the inner link.
If your chain has a disposable main link or special pin, you will need a spare to reattach the chain. Most of these special pins consist of two parts that go in from opposite sides, but it's best to consult the model-specific instructions.
Reconnect the chains using the chain tool. Replace the 2 links in the outer slot of the chain tool. Make sure the pins are facing the axis of the chain tool. Turn the handle counterclockwise. As you turn, the chain tool pin begins to push the pins through the link. Continue until you can see a small part of the link on the other side. The axis of the chain should protrude equally on both sides of the link.
Reposition the axle, if necessary. Sometimes you will need to move the chain side to side to reposition the pin. To do this, firmly grasp either side of the stiff link and gently work the chain perpendicular to its direction of rotation until the link comes loose.
Our recommended products for shortening a motorcycle chain:
To conclude, here are some recommended products on Amazon: