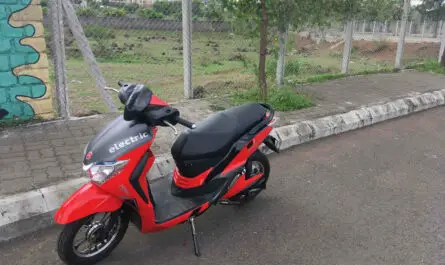
Maintain the braking systems Replacing worn components as necessary and periodically refreshing the brake fluid is an essential maintenance task that is often overlooked. In this article, we'll give you an overview of the brake bleeding process:
- Check the brake lines and banjo bolts for damage and leakage.
- Prepare to bleed your brakes by placing the master cylinder.
- Remove the tank cover or cap.
- Go to the caliper and remove any necessary covers or guards so that the bleed valve is visible.
- Begin the process of purging the scooter.
- Closely monitor the fluid levels in the reservoir.
Why should you purge your scooter?
The need to bleed the brakes on your scooter can arise for several reasons. The telltale signs of such a need are reduced braking power, irregular braking et a spongy sensation in the levier. If any of these symptoms occur, it is always a good idea to check the integrity of the system. Leaks may occur due to loose banjo bolts, damaged seals as well as cracked pipes.
Step 1: Check the brake lines and banjo bolts for damage
Unfortunately, brake fluid is an aggressive chemical and should be treated as such. Accidental contact with brake fluid can have harmful consequences for you and your scooter. At the time of maintenance of your brakes and purging your lines, be sure to take all necessary precautions and avoid contact with skin and eyes. Wear rubber gloves and safety glasses when bleeding the brakes. If the brake lever is pumped too quickly during the bleeding process, fluid can be blown up into the air from the reservoir. Brake fluid can strip paint and cloud plastics, so be sure to protect the surfaces of your scooter with a towel or rags to limit exposure.
What you will need:
Step 2: Prepare the bleeding of the brakes of your scooter by placing the master cylinder:
Prepare to bleed your brakes by placing the front or rear master cylinder and reservoir as close to horizontal as possible. When working on the front brakes, that often means turning the handlebars to one side or the other to get a level reservoir. Remember to place towels or rags around the tank in case of a spill.
What you will need:
Step 3: Remove the fuel tank cover or cap from your scooter:
Once located, remove the tank cover or cap, depending on the system you are working on. The tank cover screws may be prone to pulling out, so proceed with caution. JIS flat head screws (Japanese Industrial Standard) are generally used on Japanese equipment. Although a wick Phillips has a similar profile, it is not the right bit for the job and it will more easily decide the fixation. Obtain a set of JIS screwdrivers or bits; otherwise, the tip of a Phillips bit can be ground as needed to make the bit better fit the JIS profile.
What you will need:
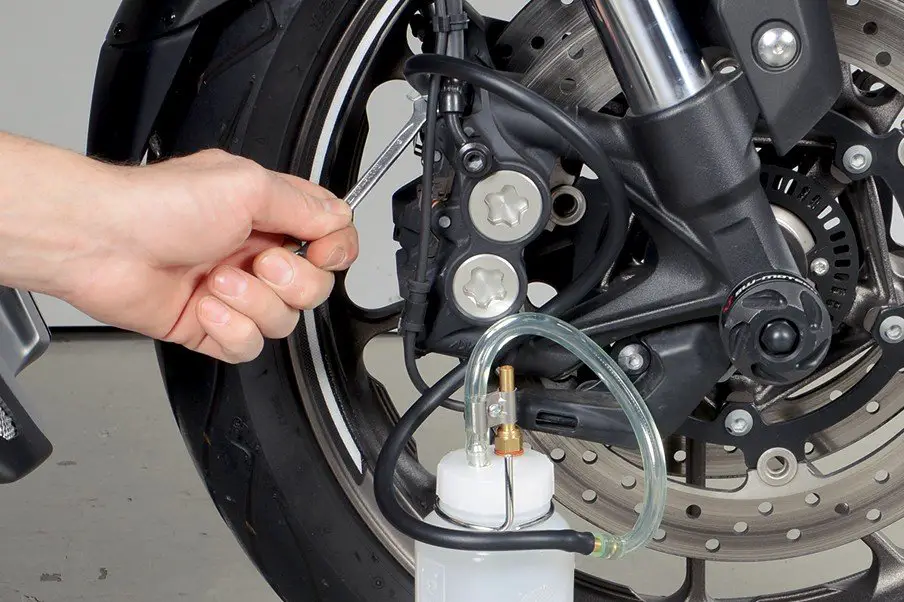
Step 4: Go to the caliper and remove any necessary covers or protections
The purge valve has a rubber cover that protects its flared nipple and should be easily identifiable. Size a piece of clear tubing so that it fits snugly over the nipple of the purge valve and is at least six inches long, or long enough to drain into a bottle of recovery.
Step 5: Begin the process of purging your scooter:
Depress the brake lever (front) or push the pedal down (rear), then open the bleed valve ¼ - ½ turn. A mixture of air and brake fluid should come out of the bleed valve and be visible in the transparent tube. Close the purge valve. Then slowly release the brake lever or pedal and leave it in its original extended position for a few seconds before repeating the process.
Step 6: Closely monitor the fluid levels in your scooter tank.
If all the liquid in the reservoir is consumed and air is sucked in, the whole process will have to be started again. Add fresh brake fluid to the reservoir, if necessary, throughout the bleeding process, to ensure that air is never sucked into the system. When adding brake fluid, be careful that no contaminants, such as dust or debris, enter the reservoir. Any small particle that ends up in the brake system can cause system malfunction or premature wear.
What you will need:
PLEASE NOTE The described bleeding procedure should be repeated until the mixture exiting the bleed nipple is completely made up of brake fluid. This may take a longer or shorter time depending on the location and the amount of air in the system. Once the brakes have been properly bled, a noticeable improvement in the feel of the brake lever or pedal should be felt when the brakes are applied.
Learn more about your scooters:
Here is an article that serves as a guide and helps you choose your scooter better before purchasing. For this, we give you the details on the characteristics and the different types of scooter.