Starting a scooter with wires isn't just for thieves. I think you need to know how a scooter works, and knowing how to start it with wires is just as crucial. Read on for more info on how to start a scooter with wires!
Step 1: Find the right wires
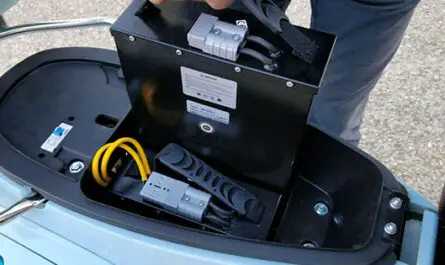
Your scooter engine needs a ignition to start. Some scooters are fitted with covers to protect the ignition wires. That's why you need to find where the ignition system wires are. However, some scooters do not come with a covered ignition wiring system. With such scooters it is very easy to find these threads. They are connected to the engine as well as to other parts of the scooter. Once you've located the wires, it's time to move on to the next step.
Step 2: You have to locate the plug and detach the two parts
When trying to find the wires using a handlebar, you need to locate three wires. These wires are covered with a bundle. The wires are intended to connect the scooter ignition system to essential parts of the scooter. To make sure you have the correct threads, make sure that the threads in question come out on the opposite side of the cap. However, do not forget to choose the cap that connects directly to the ignition of the scooter. The reason is that there may be other similar plugs.
In a scooter you will find two plugs, one that sticks out of the plugs and the other that connects to the handlebars of the scooter. That is why you need to separate the two caps.
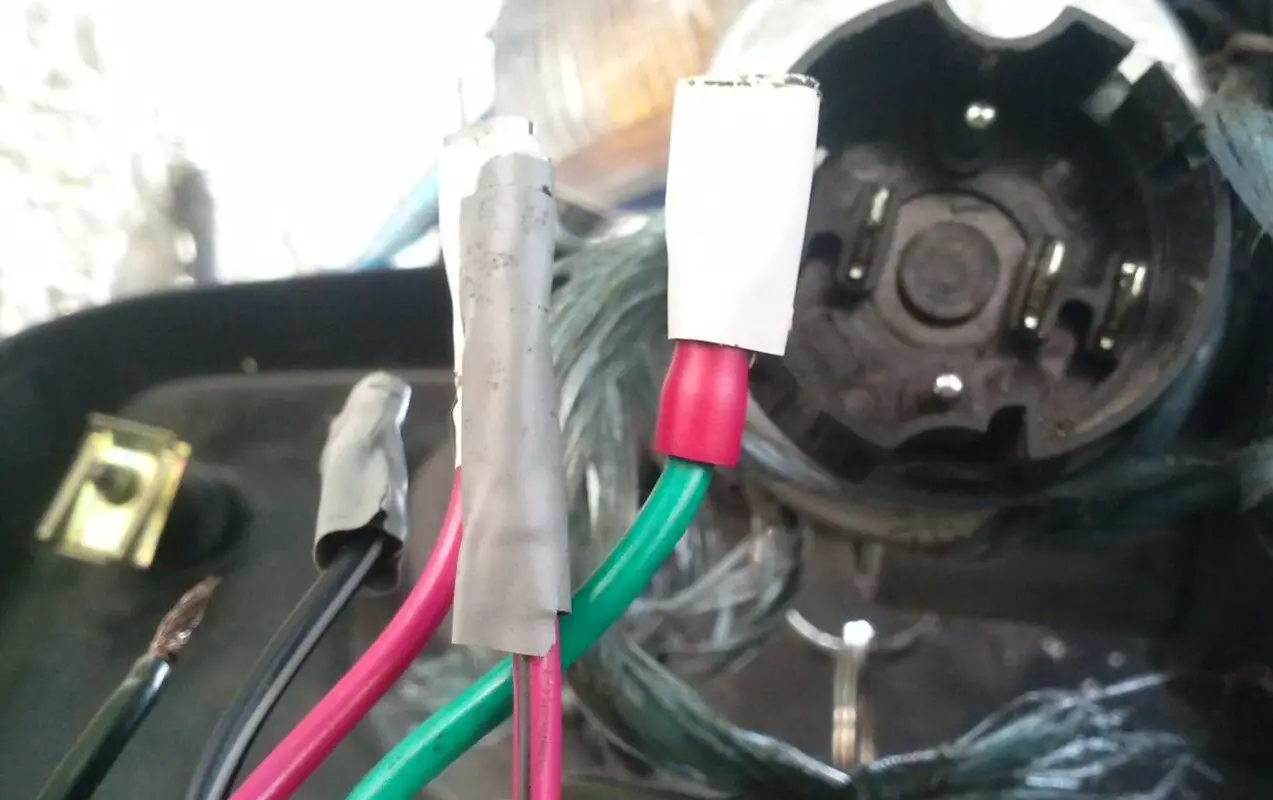
Step 3: Take the “speaker wide connector” wire and insert it into the socket.
This step is very important for this process. Remember that you separated the two caps so that you could get the sockets. You need to insert the appropriate wires into the socket.
Pull on the cap you separated earlier to release it and create enough space. Now insert one side of the wire into the first socket and the other side of the wire into the second socket. The longer threads are the most ideal. That is why you should avoid using wires less than 10cm, as they are very short for this task.
Once you insert both ends of the speaker wires into the sockets, the lights will turn on. If the lights don't seem to come on, try inserting each suitable wire into a different socket. As soon as the lights come on, it's time to take the last step.
What you will need:
Wire for your scooter: This wire should be attached to your scooter wire if it is short.
Step 4: You have to press the ignition button of the scooter:
Now that you have the lights, hit the start button. As soon as you do so, the sound of the engine will be heard and the scooter will start. The scooter is running, ready to serve you.
Congratulation ! You succeeded ! The steps we just mentioned above are easy to follow and will get your scooter back to working order in a matter of minutes. The reason is that this process is not a permanent fix, but a way to help you in case you have no other solution but to start your scooter with wires while waiting to be repaired by a specialist mechanic.
Learn more about your scooters:
Here is an article that serves as a guide and helps you choose your scooter better before purchasing. For this, we give you the details on the characteristics and the different types of scooter.