The spark plugs are supplied with voltage by the motorcycle's ignition system, which creates the necessary spark to ignite the air / fuel mixture in the engine. If your spark plugs do not perform this basic function in the engine, you will get misfiring and problems with your motorbike engine. To do this, it is essential to replace it. In this article, we will know how to change the spark plug on your motorcycle.
Motorcycle spark plugs - General information
There are a whole bunch of motorcycle spark plugs on the market that meet specific needs. So, before you get started, we advise you to take a look at our complete guide on the subject.
Why should you change the spark plug on your motorcycle?
Engines run much faster than cars, so motorcycle spark plugs wear out much faster. Every time a candle sparks, a high voltage charge passes from the center spotlight to the outer ground electrode, and tiny particles are literally burnt off from the ground electrode. Most motorcycle spark plugs have a lifespan of 10 to 20 km; or even less if the motorcycle is manhandled. Due to their location (on top of the engine, near the combustion chamber); they become extremely hot and the material of the cap decomposes, which affects the quality of the spark. If a cap is broken, the humidity of the air will affect the quality of the spark, as it will always try to skip the nearest metal ground point (like the cylinder head).
If you want to change the spark plug on your motorcycle, here is a list of essential products to change the spark plug on your motorcycle:
- Spark plugs
- Socket wrench
- Candle pliers
Our recommended products:
To conclude, here are some recommended products to change the spark plug on your motorcycle:
Other spark plugs for your motorcycle available on Amazon
The steps to follow to change the spark plug on your motorcycle:
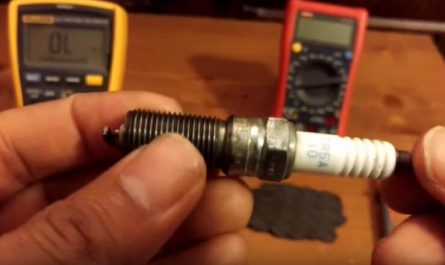
Step 1: How to choose the compatible candle?
First, always replace the old spark plug with a spark plug of the exact same type, or with an equivalent spark plug if you buy a different brand. The owner's manual gives the details of the correct spark plug - temperature range, cap size, etc. Most stores that sell candles have charts showing which model should be fitted with which candle. It is best to change all the spark plugs on the motorcycle at one time.
The rule is the same for the corks as for the candles themselves. If it is a resistor type (indicated by the letter R in the spark plug or cap symbol code), it should be replaced with the same type. The built-in resistor suppresses electrical activity. Without this resistance, the motorcycle's computer can be affected and cause a malfunction.
Spark plugs for your motorcycle available on Amazon
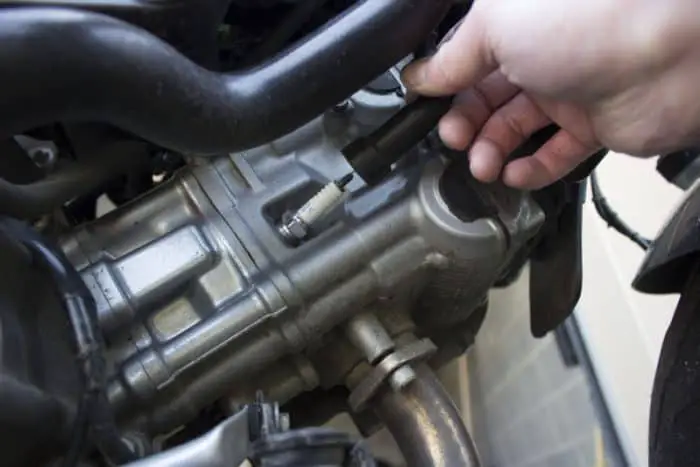
Step 2: Remove the old candle
Spark plugs are screwed into the cylinder head and protrude into the combustion chamber. This means they can be difficult to reach as the camshafts and valves are located above the combustion chamber. As if that were not enough, today it is necessary to remove the fairing, the fuel tank and the airbox of many motorcycles in order to be able to access the caps and spark plugs.
A good plug wrench makes the job easier. The gripping part (the wall of the socket) should be thick and strong to avoid rounding the gripping faces of the plug. The upper part of the socket is also provided with a rubber seal which allows the plug to be grasped when lifting it after unscrewing it and to hold it when a new plug is inserted.
Sometimes the cork wrench is not long enough to clear the space where the cork is located. If so, you will need to attach extension cords between the wrench and the ratchet. You can now undo the spark plug as you would a nut (clockwise from the top).
When the spark plug is split, unwind it from its thread by hand, holding the wrench or extension (s). This way you can feel when the plug is released from its threads and lift the key and plug to release them. It's okay if you have to undo it completely with the ratchet, but have a light hand as you don't want to tear a wire.
Step 3: Install the new spark plug
Chances are the new cap has a metal cap-like part on its top. This is an adapter that allows you to attach caps of caps that are not intended for bicycles. Remove it with pliers and throw it away if the old spark plugs don't use the same adapter. If the old plug has threads on the top (as above), this is what you will find under the adapter.
On all new spark plugs there will be a gasket / seal ring to seal the spark plug against the cylinder head. As with all plugs or bolts with gaskets (oil and coolant drain bolts), the plug should be tightened to the correct torque. A workshop manual or dealer can give you this value.
Place the new cap in the key and carefully lower it into place. Using the plug wrench / extension bar (s), screw in the plug until it is finger tight. Then attach a torque wrench to the wrench and tighten it to the correct torque. Never attempt to tighten with a simple ratchet. Broken spark plug threads in the cylinder head are expensive to repair.
Replace the old cap gaskets (top and bottom) with the new gaskets supplied with the new cap. To prevent water infiltration, coat the joints with a little silcone sealant (the same product used to seal tubs, showers and sinks against the tiles - but use the clear type) for a better sealant. perfect fit. The job is done.